

Classification System Builder
Summary
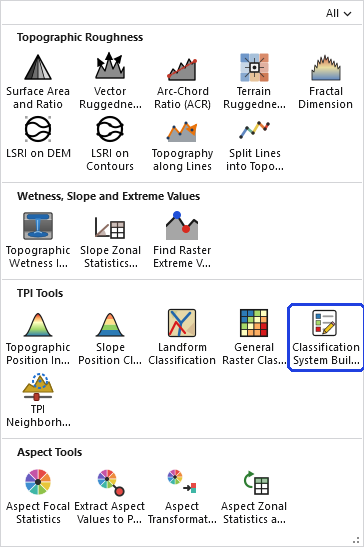
Creates, edits, duplicates and deletes the reusable classification systems applied by the Slope Position Classification, Landform Classification and General Raster Classification tools. A classification system is a named set of rules: the classes, each with a value, a name and a color, and the threshold criteria that put a cell into each class. It is authored once here, and then picked from a dropdown in any of those tools, so the output raster arrives with its class names and colors already attached. Ten systems ship with the add-in, among them 6-class slope-position and 10-class landform systems adapted from Weiss's (2001) classification system and the Corridor Designer 4-Class Topographic Position system used in the Corridor Design Tutorial. Systems are saved as JSON files in a per-user folder that survives add-in reinstalls, so custom classifications stay available and can be shared with colleagues through the Builder's Export and Import buttons. The Builder opens from the TPI Tools menu on the ribbon.
What a classification system holds
A system belongs to one of three families, which decides which input rasters its rules can refer to:
- Slope position: one TPI raster and a slope raster, applied by Slope Position Classification.
- Landform: a small-neighborhood TPI, a large-neighborhood TPI and a slope raster, applied by Landform Classification.
- General: a single raster of any kind, applied by General Raster Classification.
Besides its family, a system has a name, which is what the tools list, a free-text description, and, for the two DEM families, the slope units its slope thresholds assume, degrees or percent. Then come the classes. Each class has an integer value (any integer except 0, which is reserved for unclassified cells; negative values are allowed), a name, a color as red, green and blue, and an opacity from 0 to 100 percent. The value, name and color travel with every output raster the system produces, in its attribute table and color map, and the opacity lets a hillshade beneath the map show through the classes you choose.
Each class is defined by its criteria, one per input raster it depends on. A criterion names the input (TPI, small-neighborhood TPI, large-neighborhood TPI, slope, or the general raster), the units the threshold is expressed in, an operator and a value, and optionally a second operator and value joined to the first by and or or, which is how a range such as −1 < TPI < 1 is written. The units depend on the kind of input:
| Input kind | Units offered | Meaning |
|---|---|---|
| TPI (any of the three roles) | raw, standardized, sd, pctl | The DEM's elevation units (raw); a TPI standardized over the whole raster (standardized); standard deviations of elevation within the neighborhood (sd); or the percentile of the cell within its neighborhood (pctl). The Topographic Position Index tool produces the raw, neighborhood-SD and percentile forms; standardized is kept for systems written against a whole-raster z-score of TPI made elsewhere, and the classification tools treat it and sd as the same kind, standard-deviation units, without converting any values. |
| Slope | Degrees, Percent | The slope raster's units. The first slope criterion in a system also sets the system's slope units. |
| General raster | Cell Values, Standardized (z-score) | The raster's own values, or its whole-raster z-score. |
A cell falls into a class when every one of that class's criteria holds. Where two classes claim the same cell, the class with the lower value wins, so the values set precedence as well as identity. A system does not have to cover every possible combination of values; cells that match no class are written as unclassified.
The threshold values themselves can be found by trial with the TPI Neighborhood Sampler, which draws any threshold as a line over a snapshot of the DEM in raw or neighborhood standard deviation units, the raw and sd units of a criterion here.
A tour of the window
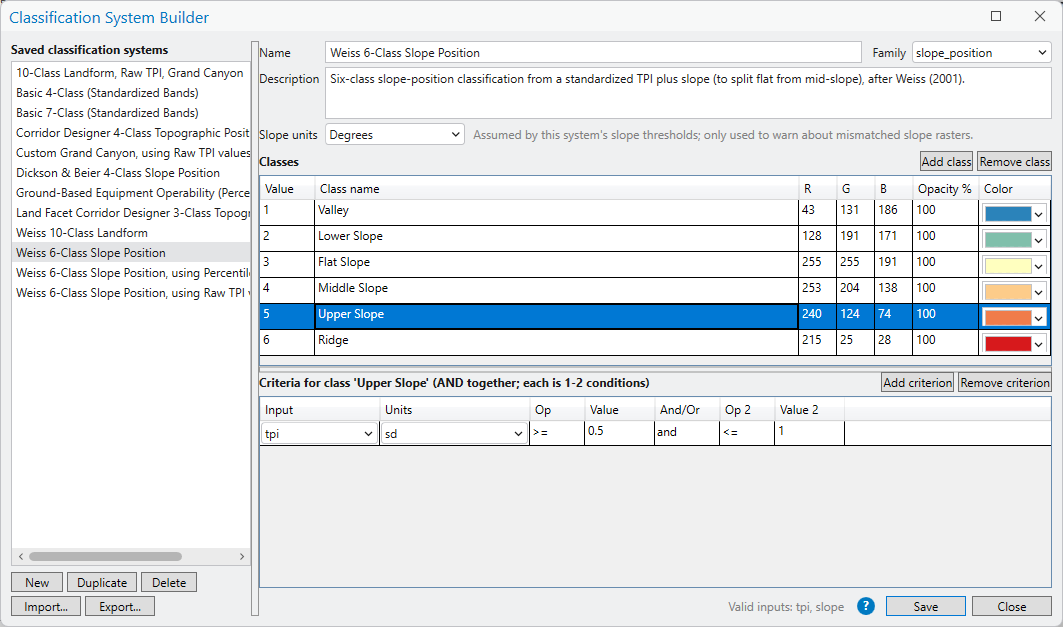
The window has two halves. On the left is the list of saved classification systems, every system in the per-user store, with two rows of buttons beneath it. New starts an empty system, Duplicate copies the selected one under a new name, which is the usual way to begin a variant of a bundled system, and Delete removes the selected one. A deleted bundled system does not stay gone: the bundled copies are restored whenever the list refreshes, so it reappears at once in its original form, which is also the way to undo edits to a bundled system. Import… and Export… move systems between users, as described under Sharing systems with colleagues. Clicking a system loads it into the editor on the right.
Several systems can be selected at once, with Ctrl+click or Shift+click. The editor then goes blank, since there is nothing to edit, and Duplicate, Export and Delete act on the whole selection: Duplicate writes a saved copy of each, named “name (copy)” (with a single system selected, the copy stays unsaved in the editor until you click Save, so you can rename it first); Export writes all of them to one file; and Delete asks once, listing every name.
The right half starts with the system's Name, Family, Description, which can run to several lines, and Slope units, with the note that they are "assumed by this system's slope thresholds; only used to warn about mismatched slope rasters." The slope-units box is disabled for the general family, which has no slope input.
Below those is the Classes grid, one row per class, with columns for Value, Class name, R, G, B, Opacity % and Color. The Color cell is Esri's own color picker, and the R, G, B and Opacity % cells update to match whatever it picks, as described below. The numeric cells accept only digits, and Value accepts a leading minus sign. Add class and Remove class sit just above the grid, at its right.
Two ways to set a color and its transparency
A class's color and transparency can be typed or picked. The quickest way is to type numbers into the grid: R, G and B for the color, and a percentage in Opacity %, where 100 is solid and lower values let whatever lies beneath the output show through. The other way uses Esri's standard color tools, the same ones used throughout ArcGIS Pro: click the class's Color swatch to open the ArcGIS palette, or choose Color properties… at the bottom of the palette to open the Color Editor, with its sliders, color modes and Transparency setting. Either way, the grid and the swatch stay in step.
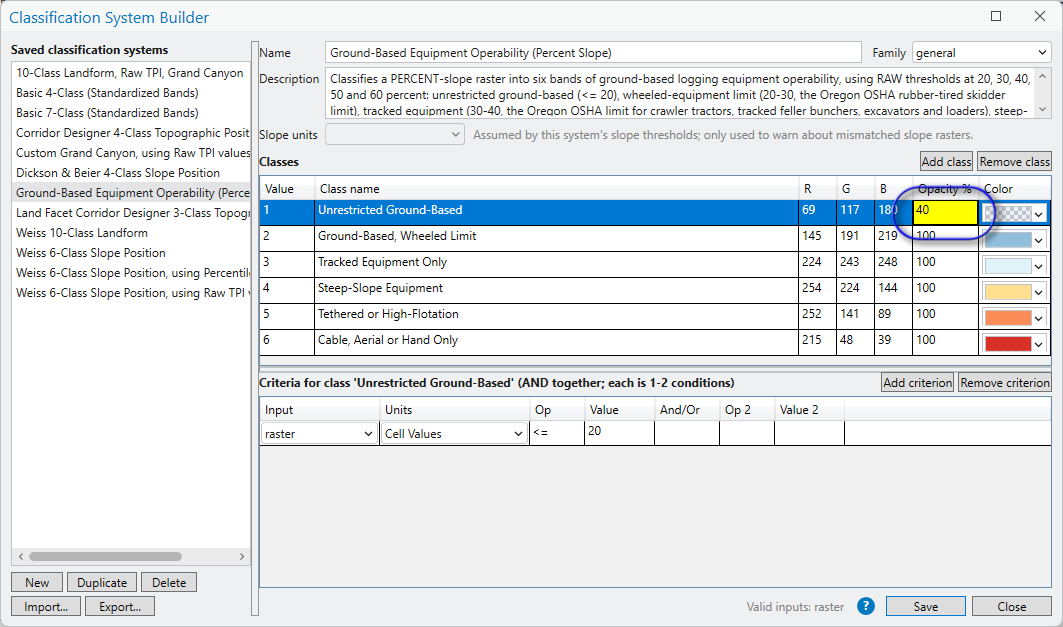
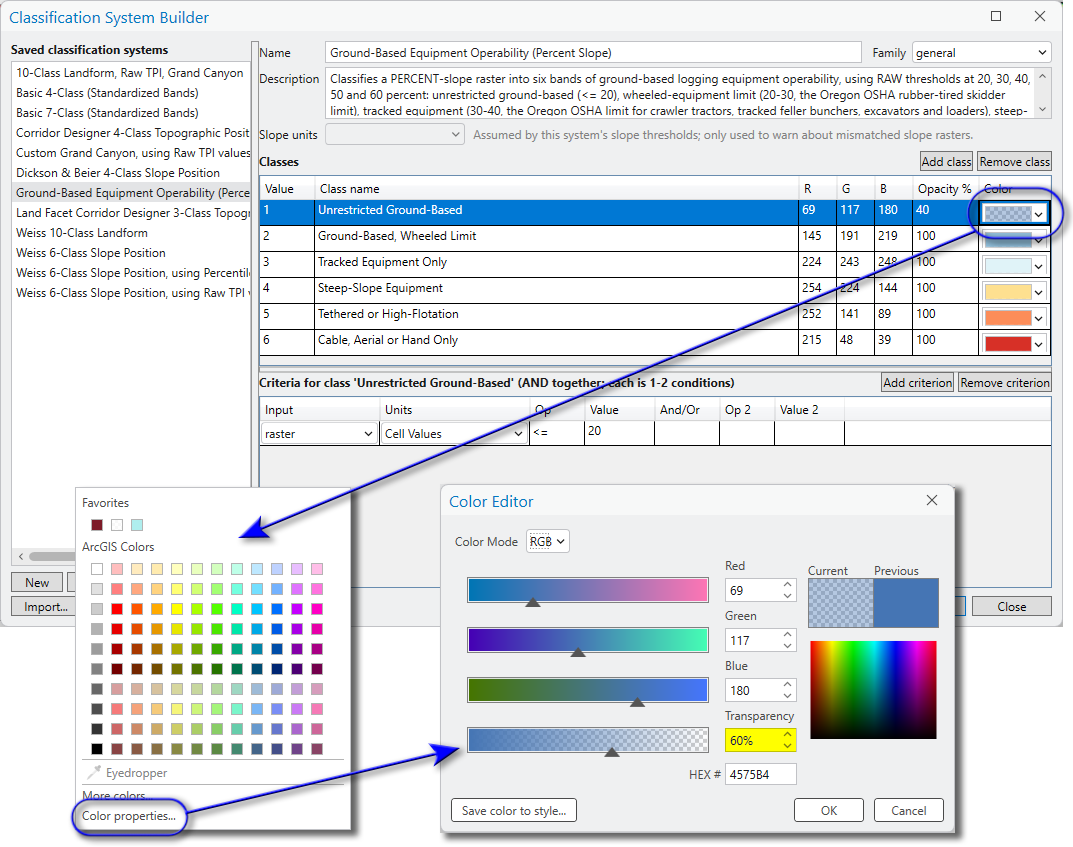
The two describe the same setting from opposite sides: the grid stores opacity and Esri's editor shows transparency, so 40 in the Opacity % column appears as 60 percent transparency in the editor. Once the output is on the map, the same Color Editor is also available from the layer's Symbology pane, for adjusting one map without changing the system.
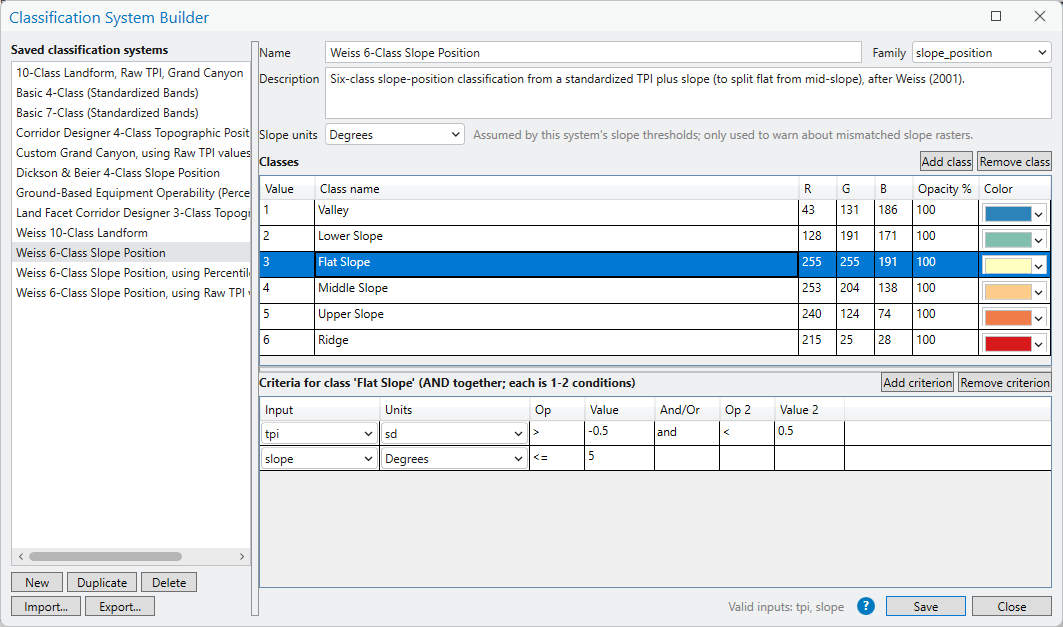
Selecting a class fills the Criteria grid below it, one row per criterion, with columns for Input, Units, Op, Value, And/Or, Op 2 and Value 2. The Input dropdown lists all five roles (tpi, tpi_small, tpi_large, slope and raster) whatever the family; a role the system's family does not declare is rejected when you save. The Units dropdown refills to match the chosen input. Leave And/Or blank for a single-condition criterion, or choose and or or and fill in the second operator and value for a range. Add criterion and Remove criterion sit just above this grid, at its right, and a note below it lists the valid inputs for the system's family (for a slope-position system, tpi, slope).
Save writes the system to the store, and Close closes the window; the blue ? beside them opens this page. Edits live only in the editor until you click Save, so if you click another system, start a new one, import, or close the window while a system has unsaved changes, the Builder asks before discarding them. Saving is where the Builder checks your work.
What Save checks
Before a system is written, the Builder runs two kinds of checks. The first is structural, and it stops the save with a message if the system cannot be applied at all: a class with value 0 (reserved for unclassified and NoData cells), a class value used twice, a system or class without a name, a class with no criterion, an input the system's family does not declare, a color outside 0 to 255, an opacity outside 0 to 100, units that the criterion's input does not offer, or a second condition whose join is neither and nor or.
The second is a range check that does not stop the save but asks before it proceeds. The Builder works out, for each input, the set of values that at least one class covers, and it reports:
- Gaps: ranges of an input's values that no class covers, so cells with those values would come out unclassified. For percentile TPI the check is limited to 0 to 100, for slope in degrees to 0 to 90, and for slope in percent to 0 and above, so a gap outside the values the raster can hold is not reported. An exact value falling between a < and a > is reported as a gap of that one value.
- Overlaps: pairs of classes whose criteria can both be true for the same cell, with a reminder that such cells get the lower class value.
- Mixed units: criteria on one input that use different units, which the tools cannot all honor, because each input is classified in one representation.
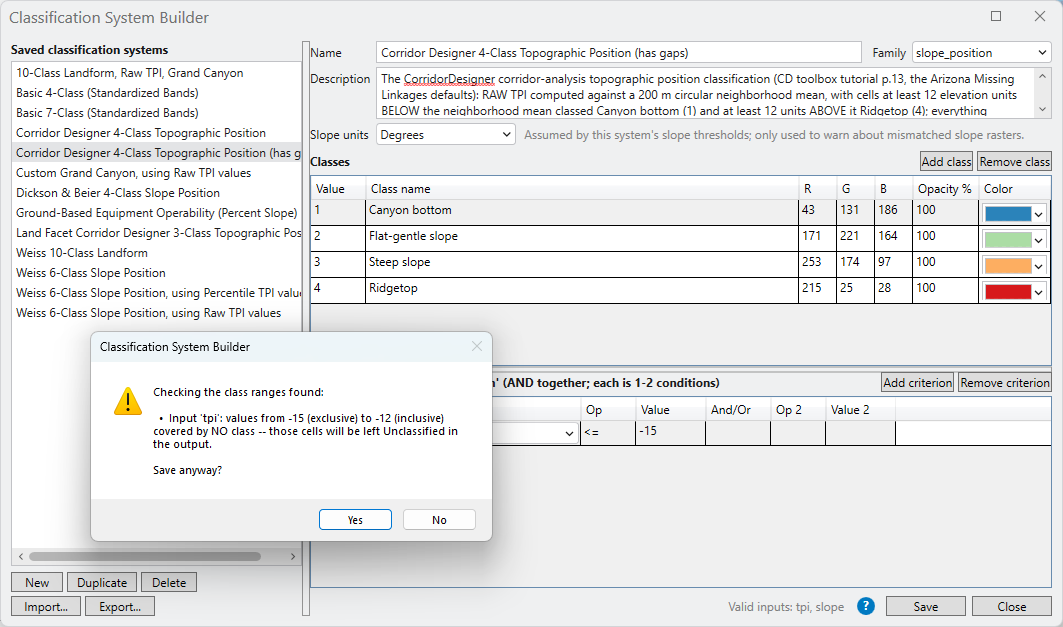
The findings are listed in a dialog that ends with "Save anyway?", and the system is saved only on Yes. Sometimes a gap is intended: a system that classifies only ridges and canyons, leaving everything between unclassified, is a legitimate choice.
One more prompt appears if you rename a system that was loaded from a file. The Builder asks whether to save the edited copy as a new system, keeping the original unchanged, or to overwrite the original under the new name, or to cancel. This protects the bundled systems from being edited away by accident.
Where the systems live
Systems are JSON files in the per-user folder
%LOCALAPPDATA%\JennessEnterprises\WildlifeTools\classification_systems\,
one file per system. The folder is outside the add-in's own
installation, so uninstalling or upgrading the add-in leaves your
systems where they are. Whenever the Builder lists the systems or one
of the classification tools opens, any of the ten bundled systems
missing from the folder is copied in; a bundled file that is
already there is never overwritten, so edits to a bundled system
survive, and deleting one restores the original.
| Family | System | Inputs and thresholds |
|---|---|---|
| Slope position | Weiss 6-Class Slope Position | TPI in neighborhood standard deviations at −1, −0.5, 0.5 and 1, and slope at 5° to split flat from middle slope (adapted from Weiss 2001). |
| Slope position | Weiss 6-Class Slope Position, using Raw TPI values | The same six classes with raw thresholds of ±5 and ±20 elevation units, to be adjusted to the DEM. |
| Slope position | Weiss 6-Class Slope Position, using Percentile TPI values | The same six classes with percentile breaks at 10, 45, 55 and 90. |
| Slope position | Dickson & Beier 4-Class Slope Position | Raw TPI at ±8 elevation units and a 6° slope split, after the cougar-movement study of Dickson and Beier (2007): ridgeline, steep slope, gentle slope, canyon bottom. |
| Slope position | Corridor Designer 4-Class Topographic Position | Raw TPI at ±12 elevation units and a 6° slope split: canyon bottom, flat-gentle slope, steep slope, ridgetop, from the CorridorDesigner toolbox tutorial (Majka et al. 2007). |
| Slope position | Land Facet Corridor Designer 3-Class Topographic Position | Raw TPI at ±6 elevation units and no slope criterion: canyons, slopes, ridges, the first-pass partition of the land facet method (Jenness et al. 2013). Built below as the worked example. |
| Landform | Weiss 10-Class Landform | Small- and large-neighborhood TPI in neighborhood standard deviations at ±1, and slope at 5° to split plains from open slopes (adapted from Weiss 2001). |
| General | Basic 4-Class (Standardized Bands) | Any raster, z-score bands at −1, 0 and 1. |
| General | Basic 7-Class (Standardized Bands) | Any raster, z-score bands at −1.5, −0.75, −0.25, 0.25, 0.75 and 1.5. |
| General | Ground-Based Equipment Operability (Percent Slope) | A percent-slope raster in six raw bands at 20, 30, 40, 50 and 60 percent, from unrestricted ground-based equipment to cable, aerial or hand only (see the General Raster Classification page). |
Sharing systems with colleagues
A classification system is a small text file, so sharing one is a matter of getting the file from one computer to another. The Builder's two sharing buttons do the file handling:
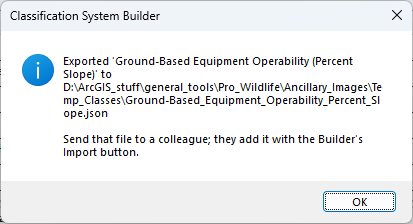
- Export… saves the selected system as a JSON file wherever you choose, with a name taken from the system's name. With several systems selected it writes them all to one file, which Import lists as separate systems. Send the file to your colleague by email, a shared drive, or any other way. Export writes the saved copy of each system, so save any edits first.
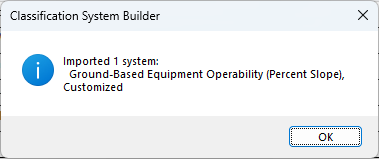
- Import… reads a JSON file and lists every classification system it finds, with each one's family and number of classes and whether it can be imported. Tick the ones you want and click Import. When one of the listed names is already in your store, the dialog says so in that system's status and asks, once for all such clashes, what to do: keep both, with the new one renamed “name (imported)”; replace yours; or skip it. The systems are validated on the way in, written to your store as your own copies, and appear in the list at once, and in the classification tools' dropdowns the next time they open.
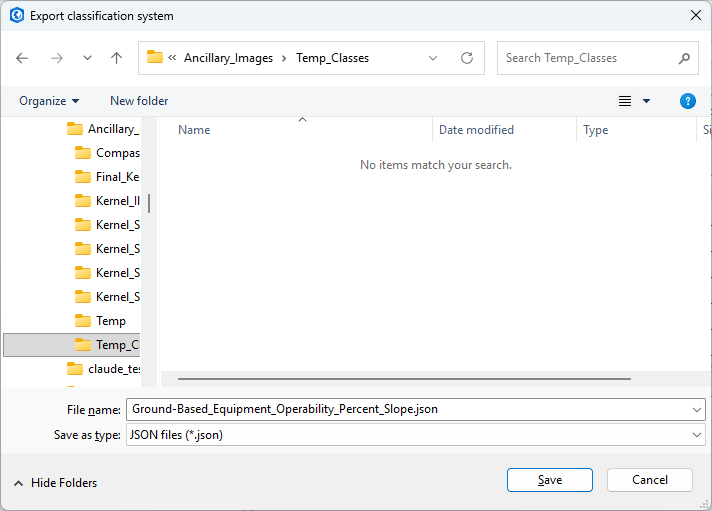
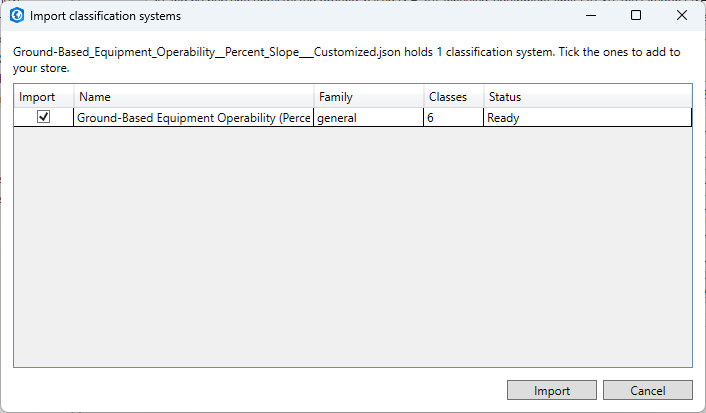
Import accepts a file holding one system, which is what Export
writes and what each file in the store contains, and also a JSON
array of systems or an object with a "systems"
array, so several systems can travel in one file. A system whose
file fails validation is listed with the reason; ticking it has
no effect, since only valid systems are imported.
Export is not the only way to get your file. Every system is
already sitting in your store folder,
%LOCALAPPDATA%\JennessEnterprises\WildlifeTools\classification_systems\,
as a file named after the system, and that file can be copied and
sent as it is; your colleague imports it the same way. It also
works to drop a received file straight into that folder, since
the Builder and the tools read every JSON file there, though
Import is the safer route: it checks the file, resolves name
clashes, and never overwrites anything without asking. If you do
open a store file to look at it, take care not to change it, as
an edited file can leave a system unreadable.
A worked example: three classes for land facets
The Land Facet Corridor Designer tools used a three-class topographic position raster, canyons, slopes and ridges, made from raw TPI with thresholds of −6 and +6 m (Jenness et al. 2013). That system ships with the add-in, and it is small enough to show every step of building a system from nothing. Here is how to build it:
- Open the Builder from the TPI Tools menu and click New. Name the system, say Land Facet 3-Class Topographic Position, set the family to slope position, and give it a description that records the neighborhood and DEM units it was designed for.
- Click Add class three times and fill in the Classes grid: value 1, Canyons, a blue; value 2, Slopes, a pale green; value 3, Ridges, a red. Pick each color by clicking its swatch.
- Select the Canyons row, click Add criterion, and set Input to TPI, Units to raw, Op to ≤ and Value to −6. Leave And/Or blank.
- Select the Slopes row, add a criterion on TPI with units raw, Op >, Value −6, And/Or and, Op 2 ≤, Value 2 6.
- Select the Ridges row, add a criterion on TPI with units raw, Op >, Value 6.
- Click Save. The range check finds no gaps and no overlaps, because the three ranges meet exactly at −6 and 6, and the system is written to the store.
The system now appears in the Slope Position Classification tool's dropdown, beside the bundled copy. To adapt a bundled system rather than start from nothing, select it, click Duplicate, and edit the copy; the copy is saved as a new file of its own, so the original is untouched. Because its thresholds are raw, the dialog will default the TPI type to raw elevation units when it is picked, and the 6 m thresholds mean what they say on any DEM in meters. This system uses no slope criterion, so it can be applied to a TPI raster alone, with no slope raster supplied.
Recommended citation
Credits and references
By Jeff Jenness, Jenness Enterprises (www.jennessent.com). The Builder is the successor of the saved criteria sets of his Topographic Position Index extension for ArcView 3.x (Jenness 2006), which stored slope-position, landform and general classification criteria in shareable tables so that the methods of Weiss (2001) could be reused and exchanged. The bundled systems are adapted from Weiss (2001) or follow Dickson and Beier (2007), the CorridorDesigner toolbox of Majka, Jenness and Beier (2007), and the Land Facet Corridor Designer of Jenness, Brost and Beier (2013).
- Dickson, B. G., and P. Beier. 2007. Quantifying the influence of topographic position on cougar (Puma concolor) movement in southern California, USA. Journal of Zoology 271:270–277. doi.org/10.1111/j.1469-7998.2006.00215.x
- Jenness, J. 2006. Topographic Position Index (tpi_jen.avx) extension for ArcView 3.x, v. 1.3a. Jenness Enterprises. jennessent.com/arcview/tpi.htm
- Jenness, J., B. Brost, and P. Beier. 2013. Land Facet Corridor Designer. Available at: corridordesign.org (archived copy at the Internet Archive)
- Majka, D., J. Jenness, and P. Beier. 2007. CorridorDesigner: ArcGIS tools for designing and evaluating corridors. Available at: corridordesign.org (archived copy at the Internet Archive)
- Weiss, A. 2001. Topographic Position and Landforms Analysis. Poster presentation, ESRI User Conference, San Diego, CA. jennessent.com/arcview/TPI_Weiss_poster.htm
Licensing information
Works at every ArcGIS Pro license level (Basic, Standard, Advanced). No extension licenses are required.
Related tools and pages
- About TPI — the Topographic Position Index and the classifications built on it.
- Topographic Position Index — compute the TPI rasters, in any of the forms a system's units can name.
- Slope Position Classification — apply a slope-position system.
- Landform Classification — apply a landform system.
- General Raster Classification — apply a general system to any raster.
- Corridor Design Tutorial — the Corridor Designer 4-class system in use.
- TPI Neighborhood Sampler — find the TPI threshold for a class by sliding it over a snapshot of the DEM.