

Clip Data to Analysis Area
Summary
Clips any mix of rasters and feature classes to an analysis area polygon in one run — and optionally projects every output to one coordinate system on the way through. A corridor or habitat analysis wants every input (land cover, elevation, roads, streams, ownership) trimmed to the same area, gathered into one workspace, in one coordinate system; doing that one dataset at a time means alternating between Clip, raster extraction, and Project while keeping formats and transformations straight by hand. This tool does the whole batch at once. A modernized port of the CorridorDesigner Clip Analysis Layers tool; no Spatial Analyst needed.
What each dataset gets
Features are clipped with the standard Clip tool; rasters are clipped to the analysis boundary as a true clipping geometry — not just its rectangular extent — with no Spatial Analyst required. Map-layer selections are honored throughout: only the selected features of an input layer are clipped, and a selection on the analysis-area layer limits the boundary. Each dataset is processed independently — one failure produces a warning and the batch continues. The output format follows the workspace: a folder gets shapefiles and GeoTIFFs, a geodatabase gets native feature classes and rasters (geodatabases are the recommended home). Output names keep their source names with your optional prefix and suffix wrapped around them — a suffix like _clip keeps outputs from ever shadowing same-named originals.
Projection, and several transformations at once
Set an output coordinate system and each clipped result is projected into it. Rasters always project with nearest-neighbor resampling — it never invents values that were not in the data, which is required for categorical rasters and faithful (if slightly blockier) for continuous ones. Output cell size and grid registration honor the Cell Size and Snap Raster environments; for a smooth surface where you'd rather use bilinear or cubic resampling, project that raster first with Esri's Project Raster tool and hand the projected copy to this tool — a raster already in the output coordinate system is clipped with no resampling at all.
- Set the environments on this tool's run. On the Environments tab, set Cell Size and Snap Raster to your reference raster (the DEM, typically) and every raster this tool projects will land on that cell size and registration, still with nearest-neighbor resampling.
- Project the raster yourself first. Run Esri's Project Raster with the exact settings you want: the output coordinate system, the geographic transformation for its datum, the resampling technique (nearest for categorical rasters such as land cover; bilinear or cubic for a continuous surface such as elevation), the output cell size, and the Snap Raster environment set to your reference raster. Then hand the projected copy to this tool, which clips it with no further resampling. Why the resampling technique matters so much for a DEM, with pictures, is on the Projecting Rasters page.
A mixed collection may need different geographic transformations (WGS 1984 sources and NAD 1927 sources both headed to NAD 1983, say), so the transformation parameter accepts several: as soon as you pick the output coordinate system, the dialog fills in a suggestion for every source datum present, with all valid alternatives on the dropdown. At run time each dataset uses the first chosen transformation valid for its own datum pair.
Back onto the map, symbolized
Check Add clipped layer(s) to map and every output is added to the active map — and when an input came in as a map layer, its clipped copy arrives wearing the source layer's symbology, so a carefully symbolized land-cover layer doesn't come back in random colors.
A tour of the dialog
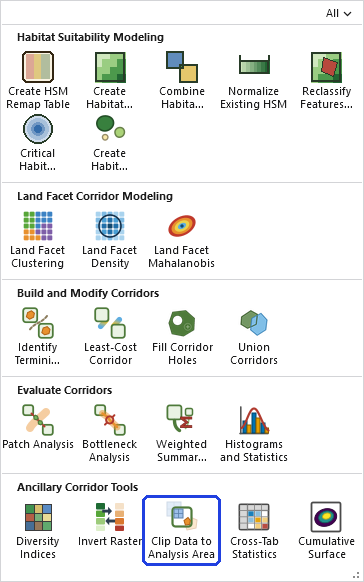
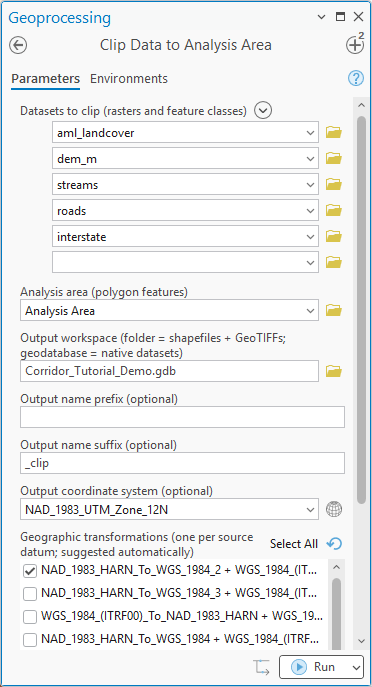
_clip suffix.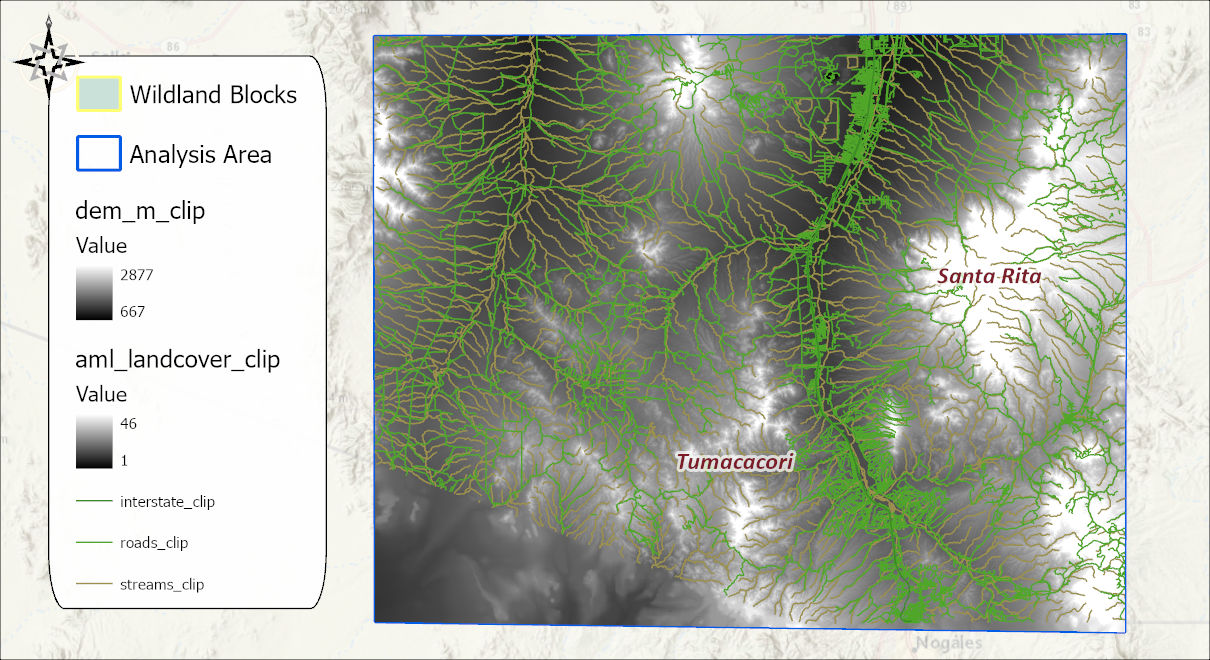
ModelBuilder
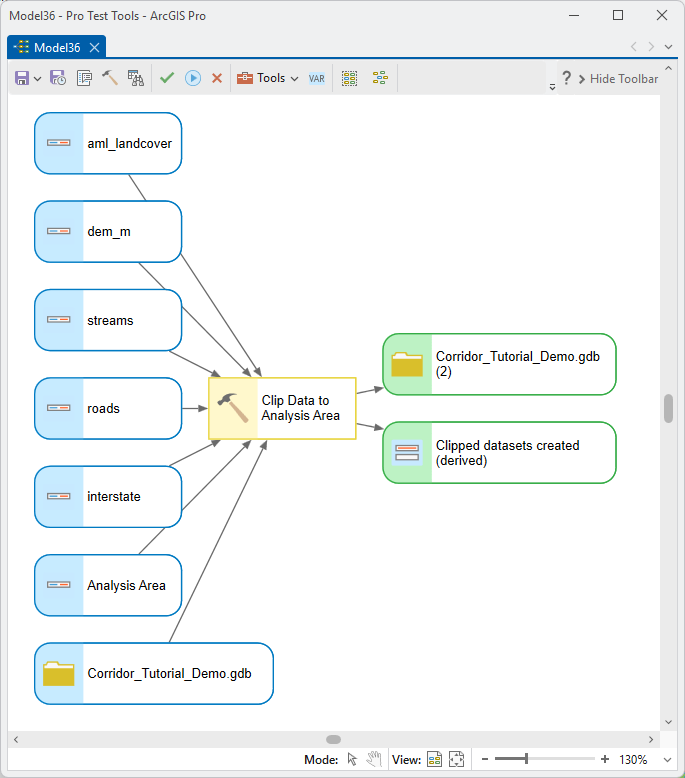
The derived outputs (the workspace and the list of clipped datasets) chain onward, so a model can clip the project's inputs and feed them straight into habitat modeling.
Parameters
| Label | Explanation | Data type |
|---|---|---|
| Datasets to clipRequired · datasets | Any mix of rasters and feature classes — drag layers from the map or browse and multi-select from disk. | Multiple Value |
| Analysis areaRequired · area | The polygon boundary; an active selection limits it. | Feature Layer |
| Output workspaceRequired · workspace | Folder (shapefiles + GeoTIFFs) or geodatabase (native datasets; recommended). | Workspace |
| Output name prefix / suffixOptional · prefix, suffix | Wrapped around each source name (e.g. suffix _clip). | String |
| Output coordinate systemOptional · out_cs | Projects every output; leave empty to keep each dataset's own coordinate system. | Coordinate System |
| Geographic transformationsOptional · transformations | Auto-suggested per source datum; accepts several for mixed-datum collections. | Multiple Value |
| Add clipped layer(s) to mapOptional · add_to_map | Adds outputs to the map, copying the source layer's symbology where the input was a map layer. | Boolean |
Python
import arcpy
arcpy.ImportToolbox(r"C:\path\to\JennessEnterprisesTools.pyt")  # your install path
arcpy.jenness.ClipDataToAnalysisArea(
    datasets=r"D:\state\landcover.tif;D:\state\roads.shp;D:\state\dem_m.tif",
    area=r"D:\corridor\project.gdb\analysis_area",
    workspace=r"D:\corridor\project.gdb",
    suffix="_clip",
    out_cs=arcpy.SpatialReference(26912))
Recommended citation
Credits and references
By Jeff Jenness, Jenness Enterprises (www.jennessent.com), ported from the CorridorDesigner tools by Jenness, Majka and Beier.
- Beier, P., D. Majka, and J. Jenness. 2007, revised 2026. Designing wildlife corridors with ArcGIS: ArcGIS Pro edition. Workshop book, revised by J. Jenness for the Corridor Designer Tools of the Wildlife and Forestry Tools add-in. Available at: CorridorDesigner_WorkshopBook_2026_ArcGISPro.pdf (5 MB)
- Majka, D., J. Jenness, and P. Beier. 2007. CorridorDesigner: ArcGIS tools for designing and evaluating corridors. Available at: corridordesign.org (archived copy at the Internet Archive)
Licensing information
Works at every ArcGIS Pro license level (Basic, Standard, Advanced). No extension licenses are required.
Related tools and pages
- Corridor Design Tutorial — Step 2 of the workflow is exactly this tool.
- About Corridor Design — why a clipped, self-contained project pays off.